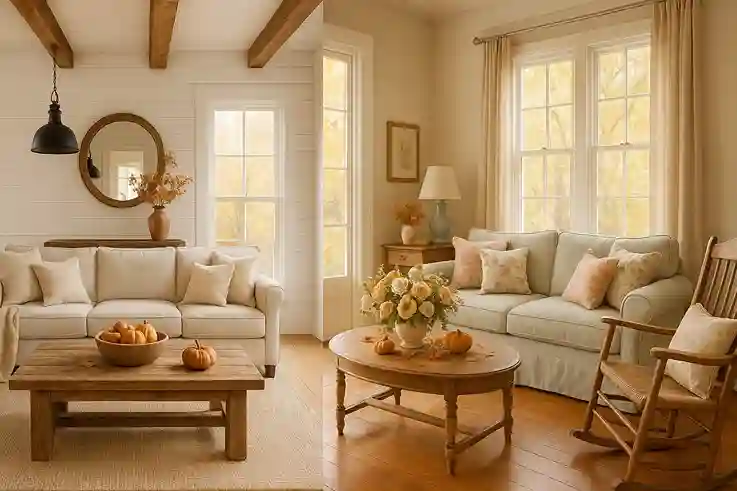
Transform Forgotten Pieces into Stunning Decor
If you’ve ever looked at an old dresser, chair, or table and wondered if it could be saved, upcycling old furniture might be your answer. It’s a creative, budget-friendly, and sustainable way to refresh your home décor while giving new life to tired pieces. With just a little time and imagination, even the most worn-out item can become a standout feature in your space.
You don’t need to be a pro to start—this beginner-friendly guide will walk you through simple projects that transform old furniture into beautiful statement pieces.
Why Upcycle Furniture?
🌿 Eco-Friendly
Upcycling old furniture helps reduce waste by giving new life to discarded pieces instead of sending them to landfills. This simple act of reuse cuts down on raw material consumption, minimizes carbon emissions from manufacturing, and lowers your overall environmental footprint. By repurposing instead of replacing, you support a circular economy and embrace a more sustainable lifestyle—one thoughtful project at a time.
💸 Affordable
Refurbishing and transforming existing pieces is often far more affordable than buying new furniture. Upcycling old furniture allows you to design personalized, stylish pieces on a budget. Whether you’re a renter or homeowner, it’s a cost-effective way to update your space without sacrificing quality or creativity.
🎨 Customizable
One major benefit of upcycling old furniture is the freedom to customize. Each piece can reflect your personal taste and suit your exact space. Whether it’s a bold color, modern hardware, or creative upholstery, the design is entirely up to you. No two upcycled items are the same—your furniture becomes as unique as your home.
😊 Fun & Rewarding
Upcycling old furniture is a hands-on, creative journey that feels truly rewarding. Taking a worn, forgotten piece and turning it into something beautiful brings real satisfaction. Each transformation adds charm and personal story to your home. The process is not only enjoyable but also boosts your confidence with every finished piece.
🛠️ Essential Tools and Supplies for Beginners
Before you begin, gather some basic supplies:
- Sandpaper (medium and fine grit) — for smoothing surfaces
- Paintbrushes and foam rollers — for applying paint and sealants
- Chalk paint or latex paint — popular choices for furniture makeovers
- Primer (optional) — helps paint adhere better and last longer
- Polyurethane or wax sealant — protects the finished surface
- Screwdriver and hammer — for removing or fixing hardware
- Wood filler — to repair dents, holes, or cracks
- Drop cloth or newspaper — to protect your workspace from spills
Easy Upcycling Projects for Beginners
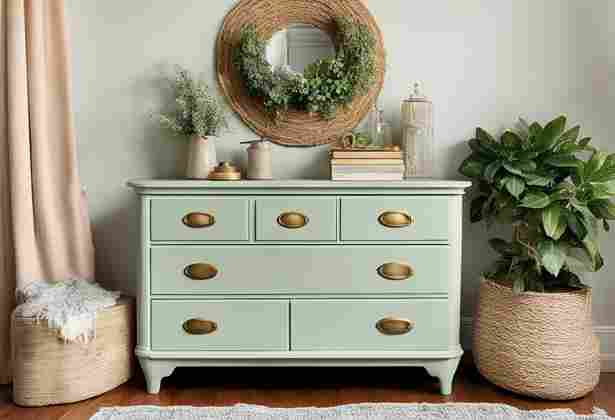
Painted Dresser Refresh
Materials: Old dresser, chalk paint, wax or polyurethane
How to:
Step 1: Prepare Your Dresser
Remove All Hardware
Before you begin, take off any existing hardware. Use a screwdriver to carefully remove knobs, handles, pulls, or hinges. Place the hardware and screws in a small container to avoid losing them. This also makes it easier to paint or stain your piece evenly, without obstructions.
Sand the Surface
Next, lightly sand the entire surface of the furniture. Use medium-grit sandpaper (around 120–150 grit) to remove any glossy topcoat or uneven texture. Sanding helps the new paint or stain stick better. Don’t skip corners or legs—consistency is key.
If the furniture has an old finish that’s peeling or cracked, spend extra time smoothing those areas. Always sand in the direction of the wood grain to avoid scratches.
Clean Off the Dust
After sanding, wipe down the entire surface with a clean, lint-free cloth. You can use a slightly damp cloth or tack cloth to catch all the dust. Any leftover dust can ruin your paint job by creating bumps and preventing proper adhesion.
Step 2: Apply the First Coat of Chalk Paint
Using a paintbrush or foam roller, apply an even coat of chalk paint over the entire dresser. Chalk paint is a favorite for many because it requires minimal surface prep. It adheres well even without primer and creates a smooth, matte finish that feels timeless and elegant.
When selecting a color, consider the mood you want to set in your space. A clean white brightens a room and suits almost any decor. Soft pastels bring a calming, gentle vibe, perfect for bedrooms or cozy corners. Bold jewel tones—like emerald, sapphire, or ruby—make a strong statement and add personality.
Apply thin, even coats to avoid drips and uneven texture. Multiple light layers usually give better coverage than one thick coat. Allow each layer to dry fully before adding the next. This careful approach helps you build a flawless, professional look.
Remember, the paint color and finish you choose set the tone for the entire piece. Whether understated or eye-catching, the right paint brings your upcycled furniture project to life.
Step 3: Dry and Recoat
Let the paint dry completely before moving on. Drying time usually takes about 1 to 2 hours but can vary based on the paint brand and room temperature or humidity.
Once dry, carefully inspect the surface. Look for any uneven spots, thin patches, or visible brush marks. If needed, apply a second coat to ensure full, even coverage.
- Applying multiple thin coats rather than one heavy layer helps create a smooth, durable finish. Patience during this step makes a big difference in the final result.
Step 4: Seal for Durability
After the paint is fully dry, it’s time to protect your finish. Applying a sealant preserves your hard work and helps the dresser resist scratches, stains, and everyday wear.
You have two main options: wax or polyurethane. Wax creates a soft, natural sheen that complements chalk paint’s matte finish. It’s easy to apply with a cloth or brush and can be reapplied periodically for maintenance.
Polyurethane provides stronger, longer-lasting protection. It’s ideal for surfaces that see heavy use, like tabletops or dressers. Available in matte, satin, or glossy finishes, it adds a durable coating that resists water and damage.
Always follow the manufacturer’s instructions for application and drying times. Use thin, even layers, and allow each coat to dry fully before adding another.
Sealing your upcycled old furniture not only enhances its appearance but also extends its life, ensuring your project stays beautiful for years to come.
Step 5: Upgrade the Hardware
Replace the old knobs or pulls with new hardware to complete your transformation. Swapping out these small details can dramatically change the look of your dresser. Choose modern metal finishes for a sleek, contemporary feel. Vintage-inspired designs add timeless charm. Or pick colorful knobs to inject a playful, personalized touch. Updating hardware is an easy way to refresh upcycling old furniture and make the piece truly yours.
For a trendy twist, try a two-toned look by painting the dresser body one color and the drawer fronts another. This creates visual interest and makes your piece truly unique!
Distressed Coffee Table
Materials: Wooden coffee table, sandpaper, stain or paint
How to:
Step 1: Lightly Sand Edges and Surfaces
- Using medium or fine-grit sandpaper, gently sand the edges and flat surfaces of your furniture piece. Focus on areas that would naturally show wear, like corners, drawer edges, and handles. This creates a charming, worn effect.
Step 2: Apply Wood Stain or Soft Paint
- Choose a wood stain for a natural finish or a soft paint color like light gray, antique white, or muted pastels for a vintage feel. Apply evenly with a brush or cloth, following the grain of the wood.
Step 3: Sand Again After Drying
- Once the stain or paint has fully dried, sand the surface lightly again, especially on the edges and raised areas. This will expose some of the wood underneath, enhancing the aged, weathered look.
Step 4: Seal with a Clear Protective Coat
- Finish by applying a clear coat—such as polyurethane or a matte varnish—to protect your piece while maintaining the vintage aesthetic. Let it dry completely before use.
Refinished Chair Makeover
Materials: Wooden chair, paint, new upholstery fabric (optional)
How to:
Step 1: Sand the Chair Thoroughly
- Begin by sanding the entire chair to remove old finish and create a smooth surface for painting. Use medium-grit sandpaper for wooden parts, paying attention to edges and detailed areas.
Step 2: Paint in Your Favorite Color
- Choose a vibrant or trendy color like navy blue, mustard yellow, or mint green. Apply the paint evenly with a brush or foam roller. Chalk paint or latex paint both work well for furniture. Allow the first coat to dry fully, then add a second coat for a richer finish.
Step 3: Reupholster the Seat for Extra Flair
- If the chair has a fabric seat, remove the old fabric carefully using a staple remover or flat screwdriver. Cut new fabric of your choice—think fun patterns, bold colors, or textured materials. Attach the new fabric tightly with a staple gun, making sure it’s smooth and secure.
Step 4: Finish with a Protective Sealant
- Seal the painted areas with a clear polyurethane or wax finish to protect your work from wear and tear. Let it dry completely before using the chair.
Storage Bench with New Hardware
Materials: Old wooden bench or trunk, spray paint, new handles or knobs
How to:
Step 1: Clean and Sand the Bench
- Start by thoroughly cleaning the bench to remove dirt, dust, and grime. Next, sand the entire surface to smooth out imperfections and help the paint adhere better. Use medium-grit sandpaper for best results.
Step 2: Spray Paint for a Smooth, Even Finish
- Choose a vibrant color to make a bold statement or a neutral tone for versatile appeal. Apply spray paint in thin, even coats, allowing each layer to dry before applying the next. This technique ensures a professional, smooth finish without brush marks.
Step 3: Upgrade with New Hardware
- Replace old knobs, handles, or accents with decorative hardware to instantly refresh the bench’s look. Choose styles that complement your color choice and overall décor.
Step 4: Add Comfort with a Cushion or Fabric Top (Optional)
- For added comfort and style, consider adding a cushion or upholstering the top with a durable fabric. Secure it well, and select fabrics that are easy to clean and coordinate with your space.
Tips for Upcycling Success
Start Small
Choose a piece of furniture you genuinely like. But make sure it won’t overwhelm you as a beginner. A small chair, side table, or simple stool is ideal. These pieces are manageable and give quick results. You’ll learn basic techniques without the pressure of a major transformation.
Smaller projects help build confidence. You’ll get used to sanding, painting, and assembling. Mistakes are easier to fix on compact items. Plus, they’re perfect for experimenting with color or finish styles.
Look for items with simple lines and solid wood construction. Avoid laminate or heavily damaged furniture for your first attempt. A sturdy piece in fair condition is best. You’ll spend more time designing and less time repairing.
By starting with a small project, you set yourself up for success. Your finished product will be rewarding and likely functional too. That positive experience will inspire your next upcycling adventure.
Prep Thoroughly
- Cleaning and sanding are the foundation of a successful upcycling project. Before you pick up a brush, prep the surface well. Start by removing dust, grime, and any sticky residue. Use a mild cleaner and let the piece dry completely.
- Next comes sanding. This step removes old finishes and smooths out imperfections. Sanding also helps paint or stain stick better. Without it, your new finish might peel or look uneven over time.
- Use medium-grit sandpaper first, then switch to a finer grit for a smooth base. Wipe down the surface after sanding to clear away debris.
- Taking time to prep ensures a long-lasting, professional-looking result. Clean wood equals clean results. Sanded surfaces make every stroke of paint count.
Use Quality Paint
Chalk paint is a beginner’s favorite—and for good reason. It goes on smoothly, dries quickly, and usually requires little prep work. If you’re just starting out with upcycling old furniture, it’s a low-stress way to get beautiful, matte results.
Latex paint is another solid option. While it might need a primer, it’s highly durable and comes in a wide variety of finishes—from satin to high gloss. It’s ideal for pieces that will see daily use, like dining chairs or desks.
The best choice depends on your goals. Want a vintage, shabby-chic look with minimal effort? Go with chalk paint. Prefer a sleeker, modern finish that can take more wear? Latex is your friend.
Either way, make sure the surface is prepped well and apply thin, even coats for the best outcome.
Seal Your Work
Once your piece is painted and fully dry, it’s time to protect your masterpiece. Applying a clear wax or polyurethane creates a barrier against scratches, spills, and daily wear. This finishing step is essential in the process of upcycling old furniture—it helps preserve the look and integrity of your work for years to come.
Choose wax for a soft, matte finish on chalk-painted items, or go with polyurethane if you need something more durable, especially for tabletops or high-use surfaces. A good sealant ensures your effort doesn’t go to waste.
Get Creative
Don’t be afraid to experiment when upcycling old furniture. This is your chance to let creativity shine. Try mixing unexpected paint colors for a bold look or apply stencils and decals for added flair. Want a modern twist? Go for trendy two-tone designs that contrast drawers and frames.
Personal touches are what turn a standard piece into something meaningful. Whether it’s a favorite color, a hand-painted motif, or a salvaged knob from another item, every detail helps tell your story.
Inspiration: Upcycled Furniture Styles to Try
Whitewashed or muted color palettes form the foundation of this design style. These soft tones reflect calm and simplicity. Often inspired by Scandinavian and farmhouse traditions, they make spaces feel open, fresh, and timeless.
Natural wood tones play a key role. You’ll often see light oak, pine, or whitewashed finishes. These surfaces retain visible grain, celebrating the organic quality of the material. The warmth of wood softens the cooler palette, creating visual balance.
Shiplap details enhance walls without overwhelming them. Originally used for practical construction, shiplap is now a beloved texture in interior design. It adds depth and character, especially when painted in subtle whites or grays.
Hardware in this style stays simple. Expect to find matte black handles, brushed nickel pulls, or even unfinished metal. These elements support the clean aesthetic without drawing attention away from the furniture’s form.
The furniture design leans toward function and comfort. Pieces are often sturdy and practical, with minimal ornamentation. Open shelving, farmhouse tables, and reclaimed wood benches are popular. Their understated elegance allows other design elements to breathe.
This approach embraces clean lines but avoids feeling sterile. Layered textures—cotton throws, woven baskets, or linen curtains—add warmth and dimension. Everything feels intentional, yet relaxed.
The goal is comfort without clutter. Each object has a role, whether decorative or functional. Empty space is used thoughtfully to emphasize what’s present, not what’s missing.
If you’re drawn to cozy minimalism, this style delivers. It offers warmth, simplicity, and purpose. Whether you’re redesigning a room or just adding a few touches, the result feels peaceful, grounded, and deeply personal.
Boho Chic
Vibrant and eclectic interiors celebrate individuality and bold self-expression. At the heart of this style are bright colors—rich jewel tones, vivid accents, and contrasting hues that instantly energize a space. No two rooms look the same, and that’s the point.
Bold patterns bring another layer of personality. You’ll often see floral prints, tribal motifs, geometric shapes, or global influences all coexisting harmoniously. Rugs, throw pillows, curtains, and wall art serve as canvases for these eye-catching designs.
Layered textures define the mood. Think velvet cushions, woven blankets, distressed woods, or metallic finishes. Mixing these materials creates a tactile, collected-over-time feel. Nothing is flat or uniform—there’s depth in every corner.
Furniture in this style leans toward the ornate and unique. Look for carved wood pieces, vintage finds, or reupholstered chairs in unexpected fabrics. Mixed materials are encouraged: leather, glass, wood, and metal often appear side by side.
The atmosphere feels relaxed and creative. It doesn’t follow rigid design rules. Instead, it celebrates contrast and imperfection. A mid-century table might sit beside a Moroccan pouf. A modern lamp could top a baroque sideboard. It’s all about visual storytelling.
This style works especially well for those who collect art, souvenirs, or flea market treasures. Each piece can stand out or blend into the tapestry, depending on how it’s styled.
Eclectic doesn’t mean chaotic. A unifying element—such as a consistent color palette or recurring shape—can tie it all together. The result is personal, vibrant, and full of life.
If you’re seeking a home that reflects your creativity and experiences, this aesthetic gives you the freedom to make bold choices and enjoy every layer.
Mid-Century Modern
Mid-century modern style is known for its timeless appeal and fuss-free elegance. At its core are bold hues—mustard yellow, avocado green, burnt orange, or deep teal—that bring warmth and energy to otherwise simple spaces. These colors are often paired with neutrals to create a balanced, grounded atmosphere.
Clean, sleek lines are the hallmark of this aesthetic. Furniture pieces feature minimal ornamentation, favoring smooth surfaces and tapered silhouettes. Legs are usually splayed or angled, giving even heavier furnishings a sense of lift and lightness. Whether it’s a sideboard or an armchair, everything feels intentional and streamlined.
Retro-inspired hardware—such as brushed brass knobs or atomic-style drawer pulls—adds subtle character without overwhelming the design. These accents offer just enough flair to make a statement while maintaining the overall simplicity of the piece.
Functionality plays a major role in mid-century modern interiors. Every element has a purpose, whether it’s storage, seating, or display. This style emerged during a post-war era when homes were being designed for both practicality and beauty, and that dual focus remains strong today.
The materials are often natural. Think walnut wood, leather, glass, and metal used in honest, unembellished ways. Textures stay consistent—smooth finishes, polished metals, and organic grains all contribute to the unified feel.
Incorporating this style into your home doesn’t require a full renovation. Upcycling old furniture is one effective way to achieve the look. For example, repainting a vintage dresser in a matte olive green and swapping the hardware for minimalist pulls can transform it into a mid-century gem. This approach is sustainable, cost-effective, and allows for personal expression without sacrificing style.
Mid-century modern design continues to resonate because of its blend of nostalgia and practicality. It’s ideal for anyone who appreciates subtle sophistication, clean structure, and enduring charm.
Rustic Vintage
Rustic style captures a sense of timeworn beauty and countryside charm. It emphasizes the raw character of materials—distressed wood, weathered finishes, and hand-forged elements. Each piece tells a story, often revealing imperfections like knots, grain patterns, or uneven textures that highlight authenticity rather than hide it.
Natural finishes dominate the rustic palette. Instead of glossy paints or synthetic stains, you’ll see wood that looks sun-bleached, lightly sanded, or reclaimed from old barns or cabins. These finishes bring a sense of warmth and grounding to a space, connecting interiors with the natural world.
The look is intentionally aged, but not in a neglected way. Rustic furniture showcases the passage of time through patina, fading, or soft wear on surfaces. Iron brackets, hammered hardware, or dovetail joints are often exposed, celebrating traditional craftsmanship over factory polish.
There’s also a strong sense of nostalgia. Rustic spaces invite comfort and familiarity. Imagine a solid farmhouse table with scuffed legs and a well-loved rocking chair near a hearth. These items offer more than function—they offer emotional resonance.
Upcycling Old Furniture fits perfectly into the rustic aesthetic. Giving a second life to a vintage bench by sanding it down, sealing the wood with beeswax, or adding simple metal braces can recreate the well-worn, heirloom feel central to rustic design. It’s also a sustainable way to furnish your home without losing character or charm.
Rustic style doesn’t strive for perfection. It embraces flaws, history, and the artistry of hand-built forms. It’s ideal for those who crave a lived-in look that’s rich in warmth, personality, and meaning.
Final Thoughts
Upcycling old furniture is an accessible way to personalize your home while practicing sustainability. With a bit of paint, sandpaper, and creativity, even beginners can create charming, unique pieces that tell a story.
Ready to get started? Pick your first project, gather your supplies, and have fun transforming your space—one piece at a time!
FAQ: Common Questions About Upcycling Old Furniture
What is upcycling, and how is it different from recycling?
Upcycling involves creatively reusing old furniture to give it a new purpose or look—without breaking it down into raw materials. Recycling, on the other hand, transforms items back into base components. Upcycling old furniture is more artistic and eco-friendly because it preserves more of the original material while reducing waste.
Do I need special tools to start upcycling old furniture?
No. Beginners can start with basic tools like sandpaper, paintbrushes, a screwdriver, and wood glue. As you grow more confident, you might add a power sander or a staple gun. Many successful upcycling old furniture projects only require creativity and minimal equipment.
What types of furniture are easiest to upcycle for beginners?
Start with small, solid-wood pieces like stools, end tables, or chairs. Avoid particle board or laminated furniture, which may not refinish well. Items with clean lines and minor wear are ideal for first-time upcyclers.
Is upcycling furniture really cost-effective?
Yes. You can often find free or cheap furniture at thrift stores, garage sales, or curbside. With just a few supplies, upcycling old furniture can cost significantly less than buying new—and the results are unique and personal.
How can I make sure Upcycling Old Furniture is safe to use?
Check for stability, sharp edges, and signs of rot or pests. Always clean pieces thoroughly. Use non-toxic paint or sealants, especially for items used by kids or in the kitchen. Safety should always come before style.
Can I sell upcycled furniture?
Absolutely. There’s a growing market for unique, eco-conscious furniture. Quality craftsmanship, style, and good marketing can turn upcycling old furniture into a side hustle or even a small business.

Silvia Heart is a lifestyle and wellness writer with a background in apparel and a degree in fashion. She blends creativity with practical insights, guiding readers toward intentional, balanced living. Through her approachable style and thoughtful storytelling, Silvia inspires her community to embrace both everyday joy and personal growth.