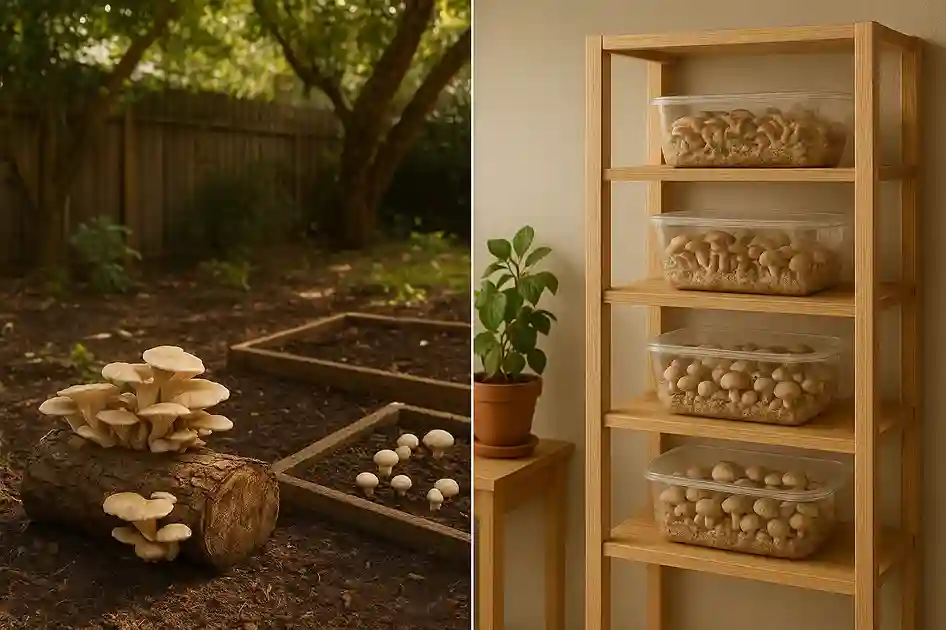
How to Grow Mushrooms is easier than many home gardeners realize. Mushrooms are rewarding because they grow quickly, require little space, and add rich nutrition to meals. Unlike traditional plants, they thrive in dark and moist areas, making them perfect for indoor or shaded spots. Growing your own mushrooms at home is also sustainable, reducing reliance on store-bought produce.
You can start small with backyard cultivation using logs or soil beds, or explore modern vertical farming setups to maximize space. Both methods allow you to enjoy a steady supply of fresh, flavorful mushrooms right from home.
What Makes Mushrooms Special?
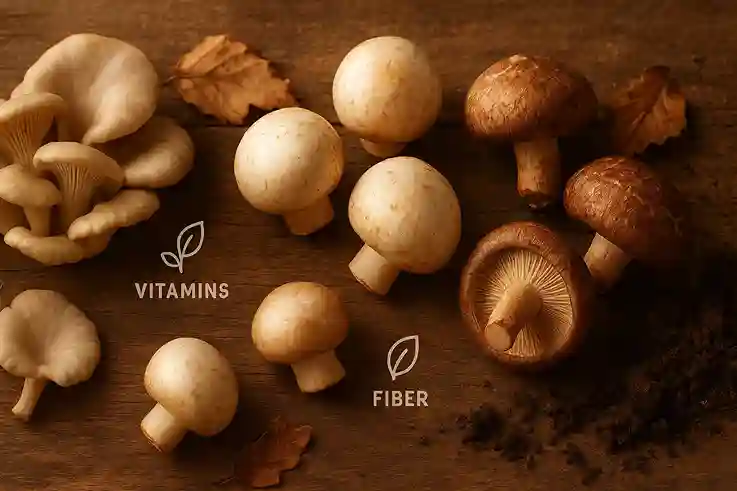
Mushrooms stand out as more than just another ingredient in the kitchen. They are packed with essential nutrients that make them a valuable addition to a healthy diet. Rich in protein, fiber, and B vitamins, mushrooms also provide minerals such as selenium, potassium, and copper. Many varieties contain antioxidants that help protect the body from oxidative stress, while some even offer small amounts of vitamin D when grown under natural light. Their earthy flavors range from delicate and nutty to bold and meaty, making them versatile in countless recipes. From stir-fries to soups, mushrooms elevate both taste and nutrition.
Unlike traditional garden plants, mushrooms are fungi, which means they grow without seeds, flowers, or photosynthesis. Instead of relying on sunlight, they thrive in moist and dark conditions, feeding on organic matter like straw, sawdust, or compost. This unique growth cycle makes them a perfect option for gardeners who may not have open land or sunny spaces. While most vegetables demand direct light and frequent care, mushrooms can quietly flourish indoors, in basements, or shaded backyard corners.
Beyond nutrition and gardening ease, mushrooms also benefit the environment. As natural decomposers, they break down organic waste, recycling nutrients back into the soil. This process improves soil health and supports sustainable gardening practices. Some fungi even form beneficial partnerships with plants, boosting root strength and improving water absorption. In this way, growing mushrooms isn’t just about harvesting food—it contributes to a healthier ecosystem overall.
How to Grow Mushrooms at Home
Growing mushrooms may seem complex, but the process is surprisingly simple once you understand the basics. With the right conditions, even beginners can succeed.
Step 1: Choose Your Substrate (Day 1)
Mushrooms need a nutrient-rich base called a substrate to grow. This acts as their food source and environment, much like soil does for plants. Common substrates include straw, sawdust, coffee grounds, or compost. Each option has its advantages—straw is inexpensive, sawdust holds moisture well, and coffee grounds recycle household waste into something useful.
Whatever you choose, the substrate must be clean and free from contaminants, since competing organisms can hinder mushroom growth. It should also remain slightly moist but not waterlogged, as excess water can encourage mold. Preparing your substrate usually takes just a single day, making it a simple first step for beginners eager to start their mushroom journey.
Step 2: Inoculate with Spores or Spawn (Day 2)
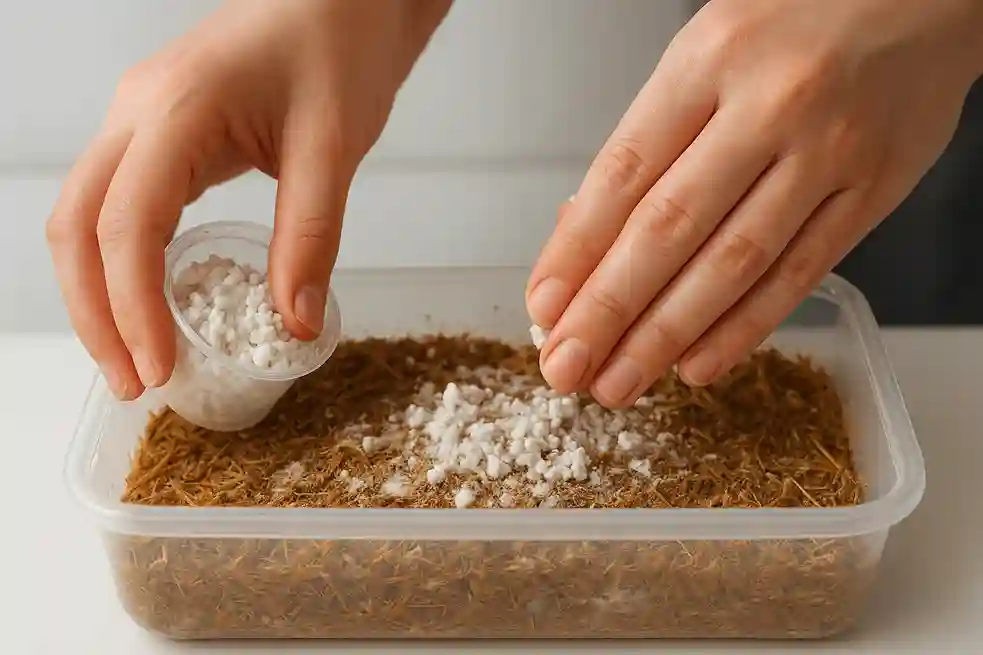
Instead of seeds, mushrooms grow from spores or a starter material called spawn. Spores are microscopic and usually require careful lab conditions, so most beginners use spawn for simplicity. Spawn is essentially a carrier, often made from grains or sawdust, that has already been colonized with mushroom mycelium. To begin, spread the spawn evenly across your prepared substrate so the fungi can settle in quickly.
This step encourages the mycelium to spread and establish itself, a process known as colonization. Setting up inoculation usually takes only a few hours, making it one of the most straightforward parts of mushroom growing. Once finished, the fungi will quietly begin their work beneath the surface, preparing for visible growth in the weeks ahead.
Step 3: Incubation and Mycelium Growth (2–4 Weeks)
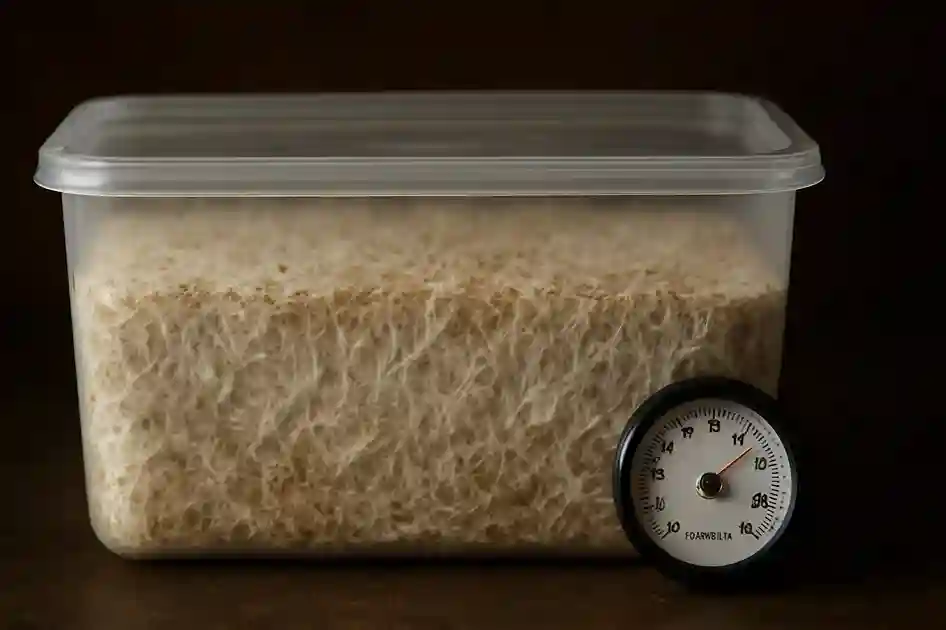
After inoculation, white thread-like structures called mycelium begin spreading through the substrate. At this stage of learning how to grow mushrooms, patience is key. Full colonization often takes between two and four weeks, depending on the mushroom variety. During this time, the mycelium works quietly beneath the surface, breaking down nutrients and preparing for fruiting.
To support steady growth, keep the substrate in a warm, dark place with consistent moisture. Checking regularly ensures the environment stays favorable without being disturbed too often. This stage is the foundation of successful mushroom cultivation, so careful attention here pays off later with healthy harvests.
Step 4: Maintain Proper Humidity (Throughout Growth)
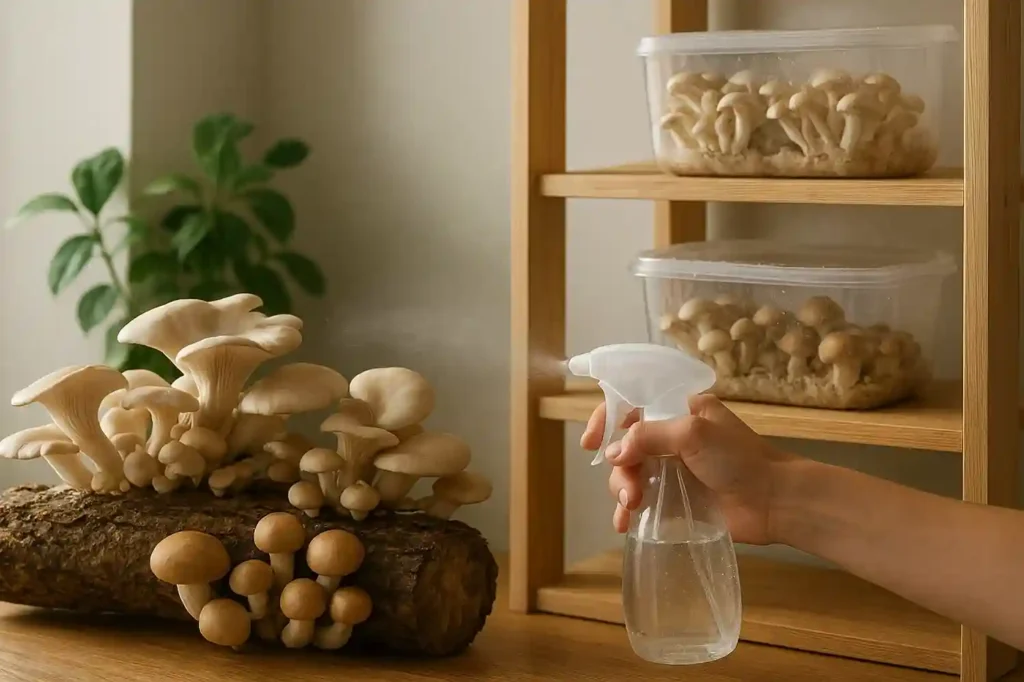
Moisture is critical for mushroom development, and it plays a central role in understanding how to grow mushrooms successfully. The growing environment should remain damp but never waterlogged, as excess moisture can invite mold. A simple spray bottle works well for lightly misting the surface each day, while a humidity tent or plastic cover can help lock in moisture.
Consistency is more important than quantity—steady dampness encourages the mycelium to produce healthy fruiting bodies. Mushrooms naturally thrive in dark or shaded spaces, so no direct sunlight is needed. By maintaining the right humidity and shade, you create conditions that mimic their natural forest habitats, giving your mushrooms the best chance to flourish.
Step 5: Fruiting and Mushroom Sprouting (7–14 Days)
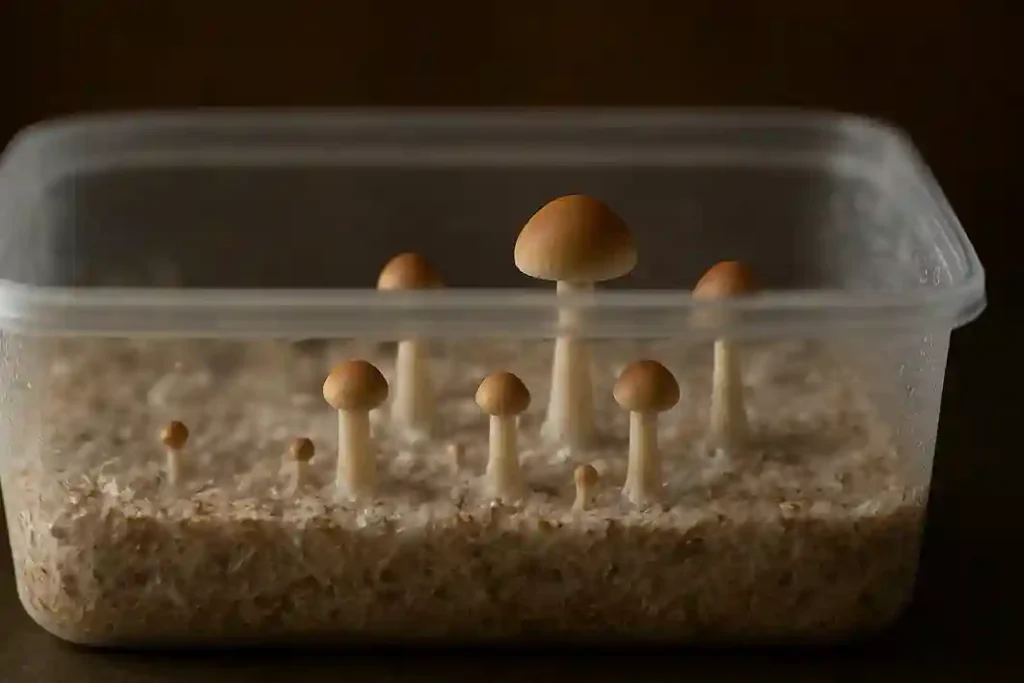
Once the mycelium has fully colonized the substrate, mushrooms begin to form. At this point in learning how to grow mushrooms, you’ll notice the start of the fruiting stage. This stage usually lasts one to two weeks. Tiny structures called “pins” appear first, resembling small bumps on the surface. With the right humidity and airflow, these pins grow rapidly into mature mushrooms ready for harvest.
Watching this transformation is one of the most rewarding parts of mushroom cultivation, as the results of weeks of preparation become visible almost overnight.
Easy Varieties for Beginners
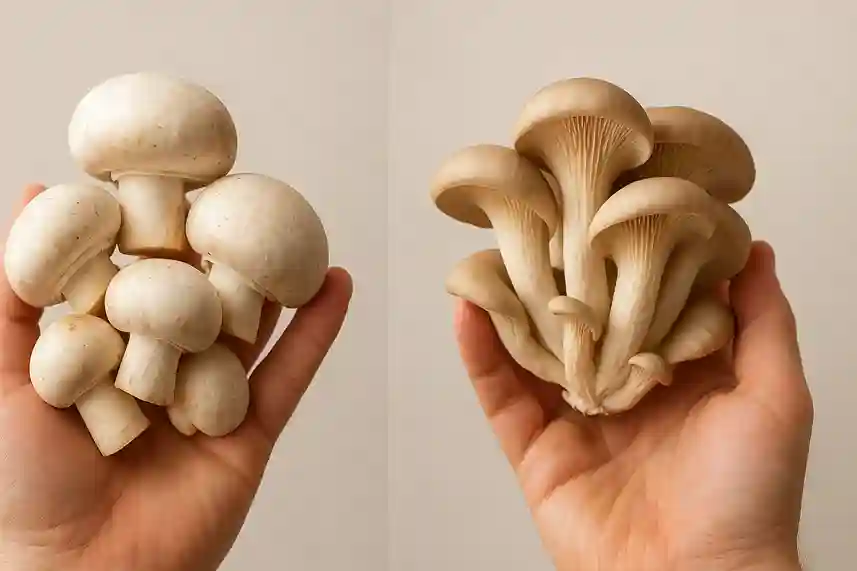
For first-time growers exploring how to grow mushrooms, oyster and button mushrooms are excellent choices. Oyster mushrooms are fast-growing, highly adaptable, and can thrive on a wide range of substrates such as straw, sawdust, or even coffee grounds. Button mushrooms, on the other hand, are among the most familiar varieties found in kitchens and are well-suited for compact spaces.
Their mild flavor makes them versatile for many recipes, and their cultivation process is straightforward for beginners. Both oyster and button mushrooms are typically ready to harvest within four to six weeks of starting the process, offering quick results and a rewarding first harvest for home gardeners.
Beginner-Friendly Mushroom Varieties
| Mushroom Type | Best Substrate Options | Growth Time (to Harvest) | Difficulty Level |
|---|---|---|---|
| Oyster | Straw, sawdust, coffee grounds | 4–5 weeks | Easy |
| Button | Compost, manure-enriched soil | 5–6 weeks | Easy–Moderate |
Growing Mushrooms in Your Backyard
Backyard cultivation is one of the most accessible ways to learn how to grow mushrooms. With the right setup, outdoor conditions can provide everything mushrooms need.
Outdoor Methods for Beginners
Logs
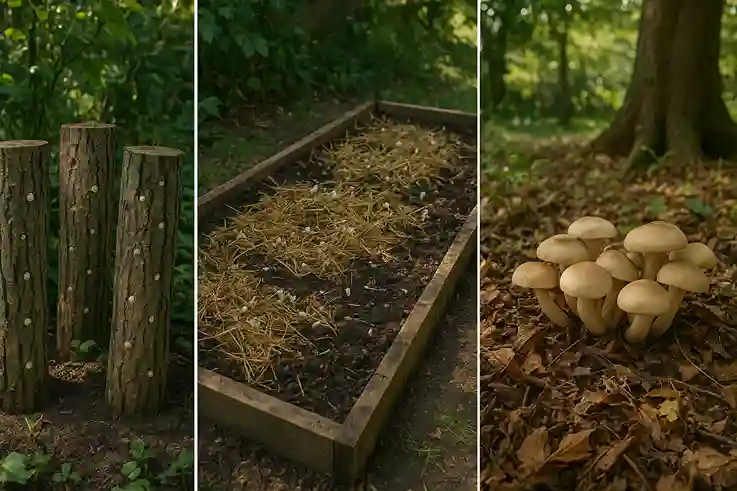
Logs are one of the most traditional and reliable methods for anyone learning how to grow mushrooms outdoors. Start by drilling small holes in fresh hardwood logs, such as oak or maple. Fill the holes with mushroom spawn and then seal them with food-grade wax to protect against contamination and moisture loss. Place the logs in a shaded, damp area of your backyard where they will not dry out.
Over the following months, the mycelium spreads through the wood. Once fully colonized, mushrooms begin sprouting directly from the log’s surface. This method requires patience, but the reward is multiple harvests from the same log for several years.
Soil Beds
Soil Beds are a simple and effective method for those exploring how to grow mushrooms in the backyard. To begin, prepare a shallow bed in a shaded corner of your garden. Line it with compost, straw, or a mix of both to create a nutrient-rich base. Spread mushroom spawn evenly across the surface and lightly cover it with more compost or straw to protect the developing mycelium.
Keep the bed consistently moist but not waterlogged, as steady dampness is essential for growth. With proper care, the mycelium spreads through the bed and produces flushes of mushrooms. This method is especially suited for varieties like wine cap mushrooms, which thrive in garden soil and can return year after year.
Shaded Areas
Shaded Areas provide a natural environment for learning how to grow mushrooms with minimal effort. Certain varieties, such as wine cap mushrooms, thrive beneath trees where leaf litter helps trap moisture and keep the soil cool. To get started, spread mushroom spawn over a layer of wood chips or straw placed under the canopy of trees or large shrubs.
The natural shade protects the bed from drying out while the organic material provides nutrients for the mycelium. With regular watering during dry spells, the mushrooms will gradually establish themselves and may return each year. This method is one of the most low-maintenance options for backyard growers, as it works with natural conditions already present in the garden.
Seasonal and Climate Considerations
Mushrooms prefer mild, humid environments, which is why timing and climate play an important role in learning how to grow mushrooms outdoors. Spring and fall are ideal seasons for backyard cultivation since temperatures are moderate and natural rainfall helps maintain soil moisture. In very hot or dry regions, growers may need to provide extra shade, misting, or even a humidity tent to keep conditions stable.
On the other hand, cold regions can still support mushroom growth by using insulated beds, placing logs in sheltered areas, or selecting cold-tolerant varieties such as oyster or shiitake mushrooms. Matching your growing method to the local climate ensures stronger yields and healthier harvests year after year.
Best Mushroom Varieties by Climate
| Climate Type | Growing Tips | Recommended Varieties |
|---|---|---|
| Hot/Dry | Provide shade, mist often, use humidity tents | Oyster, Wine Cap |
| Cold | Insulate beds, shelter logs, choose hardy types | Shiitake, Oyster |
| Temperate | Moderate care, natural rainfall is helpful | Button, Wine Cap, Oyster |
Maintenance for Healthy Growth
Consistent moisture is essential when learning how to grow mushrooms in your backyard. Regular misting or gentle watering keeps the substrate from drying out, but it’s important to avoid overwatering, which can encourage mold and other contaminants. Good airflow is equally important, as stagnant air may weaken growth and reduce yields.
Backyard growers should also watch for pests such as slugs, which are often drawn to damp mushroom beds and can damage developing crops. With steady care—balanced moisture, airflow, and pest checks—your backyard setup can provide healthy, reliable harvests season after season.
Vertical Farming: A Modern Way to Grow Mushrooms
Vertical farming offers a modern, efficient method for anyone exploring how to grow mushrooms indoors. Instead of relying on outdoor space, this approach uses stacked layers or shelving units to maximize production in a compact area.

Indoor Controlled Environment Techniques
Mushrooms thrive in controlled indoor spaces, making this an important step in understanding how to grow mushrooms using vertical farming. In these setups, humidity, temperature, and airflow can be managed with precision, ensuring consistent results. Growers often use plastic containers, grow bags, or shallow trays filled with substrate, then arrange them neatly on shelves or racks.
Small humidifiers keep moisture levels steady, while fans maintain airflow to prevent stagnation. LED lights are used only for workspace visibility since mushrooms do not require sunlight. By creating this stable indoor environment, growers avoid many outdoor challenges such as pests, fluctuating weather, and seasonal limitations, allowing for a reliable harvest year-round.
Benefits of Vertical Farming for Space-Saving
Multiple Layers
Vertical setups make it easy to learn how to grow mushrooms in stacked shelves or racks. This design maximizes growing space by using height rather than floor area, making it perfect for small homes or urban settings.
Small-Space Friendly
One of the biggest advantages of vertical farming is that it shows how to grow mushrooms even in tight living spaces. Apartments, basements, and garages that lack outdoor gardens can still support productive mushroom setups. By stacking shelves or using compact grow bags, you can transform unused corners into thriving mini-farms without needing a backyard.
Higher Yields
Vertical farming demonstrates another efficient way of mastering how to grow mushrooms. By stacking shelves, you multiply the available growing surface without expanding the floor space. This means even a small room can produce several times more mushrooms than a traditional single-layer setup. The result is a steady, abundant harvest that makes the most of limited space.
Year-Round Harvests
A major benefit of vertical farming is that it shows growers exactly how to grow mushrooms without relying on the seasons. By controlling temperature, humidity, and airflow indoors, you can create stable conditions that support mushroom growth throughout the year. This means fresh harvests are possible in winter, summer, or during unpredictable weather—something outdoor setups cannot guarantee.
Scalable Method
Vertical farming makes it simple to learn how to grow mushrooms at your own pace. Beginners can start small with just one or two shelves to test the process. As confidence and experience grow, it’s easy to expand the system by adding more shelves, trays, or containers. This flexibility allows home gardeners to scale up production gradually, matching their harvests to their needs without a large upfront investment.
Farm to Table Freshness
One of the most satisfying parts of learning how to grow mushrooms with vertical farming is the ability to enjoy them straight from your own setup. Harvesting and cooking within minutes ensures maximum flavor, texture, and nutrition. Unlike store-bought mushrooms that may sit in storage or transit, homegrown mushrooms deliver true farm-to-table freshness right in your kitchen.
Small-Scale Setup Ideas for Home Gardeners
Home gardeners curious about how to grow mushrooms indoors can begin with simple, small-scale setups. A few stacked plastic bins or wooden shelves are often enough to get started. Line the containers with nutrient-rich substrate, add mushroom spawn, and maintain the right humidity using a spray bottle or a compact humidifier. For even better efficiency, use clear plastic bags with small air holes.
These bags retain moisture while allowing proper airflow, creating ideal conditions for mushroom growth. Such systems are inexpensive to build, easy to manage, and provide a practical entry point into indoor mushroom cultivation.
Vertical Farming vs. Backyard Growing
| Aspect | Vertical Farming | Backyard Growing |
|---|---|---|
| Space Use | Maximizes small areas with stacked shelves. | Requires garden space, shaded spots, or logs. |
| Control | Full control over humidity, temperature, airflow. | Dependent on climate and seasonal changes. |
| Yield | Higher yields year-round in limited space. | Seasonal harvests, yield varies with conditions. |
| Setup Cost | Moderate upfront cost (shelves, humidifier, spawn). | Low-cost using natural logs, soil, or compost. |
| Maintenance | Regular monitoring of humidity and airflow. | Requires watering, pest control, and shade care. |
| Accessibility | Suitable for apartments, basements, garages. | Best for those with outdoor garden space. |
| Farm-to-Table | Consistent fresh harvests indoors. | Naturally grown, earthy flavor from outdoor soil. |
Common Mistakes to Avoid
When learning how to grow mushrooms, beginners often face a few avoidable challenges. Being aware of these issues early helps ensure a healthy and productive harvest.
1. Overwatering or Drying Out
Mushrooms need steady moisture for healthy development. Too much water encourages mold, while dryness halts growth. When learning how to grow mushrooms, keep the substrate damp but never soggy, and check conditions daily.
2. Using Contaminated Spores or Spawn
Healthy spores or spawn are the foundation when learning how to grow mushrooms. Contaminated material introduces mold or bacteria that quickly overtake the substrate. To avoid failure, always source from trusted suppliers.
3. Poor Air Circulation
Mushrooms thrive in humid yet well-ventilated spaces. Stale, stagnant air encourages disease and weak growth. A small fan or open vent ensures fresh airflow without drying the substrate.
4. Skipping Cleanliness
Cleanliness is vital when practicing how to grow mushrooms. Even small amounts of dirt, dust, or unwashed hands can introduce harmful organisms. Always sanitize tools and work surfaces before handling spores, substrate, or mushrooms.
FAQ : How to Grow Mushrooms
Conclusion: How to Grow Mushrooms
Learning how to grow mushrooms at home is both rewarding and surprisingly simple. Whether you choose backyard methods like logs or soil beds, or modern vertical farming indoors, the process offers fresh harvests and a closer connection to your food. With the right balance of moisture, cleanliness, and patience, anyone can enjoy reliable yields of edible mushrooms.
For more detailed step-by-step guidance, check out this beginner’s guide to growing mushrooms at home from Utah State University Extension.
Have you tried to grow mushrooms at home before? Share your experiences, tips, or questions in the comments— We will love to hear your stories!
“Every bite of mushrooms is nature’s reminder that flavor and nutrition can grow from the simplest places.”

Michael Reyes is a versatile blogger with a primary focus on farming and sustainable living. Growing up close to nature, he developed a deep interest in agriculture and enjoys sharing practical tips on backyard farming, modern cultivation techniques, and eco-friendly practices. While farming remains his specialty, Michael also writes on a wide range of topics, from lifestyle and travel to everyday inspiration, making his work relatable to a broad audience.
Outside of writing, Michael enjoys spending time outdoors, experimenting with new farming methods, and exploring different cultures through food and travel. His approachable voice and well-researched insights make his blogs both informative and engaging.
