Grow Oyster Mushrooms is easier than most people think. These mushrooms are popular because they taste rich, provide excellent nutrition, and grow with little effort. People enjoy them in kitchens across the United States for their meaty texture and mild flavor. They also offer health benefits like protein, vitamins, and antioxidants.
With the right setup, you can start growing them in small spaces at home. The process is clean, simple, and surprisingly fast. Even beginners can see their first flush of mushrooms within weeks. The best part is that the results feel exciting and satisfying—you harvest fresh food you grew yourself.
Why Choose Oyster Mushrooms
Oyster mushrooms are an ideal choice for home growers. They adapt well indoors or outdoors, which makes them highly versatile. You do not need a garden or large equipment. A small corner, a bag, and the right substrate are often enough. They also require little investment compared to many crops. Most beginners start with kits or simple DIY methods. The process is quick, reliable, and accessible to almost anyone.
Beyond simplicity, oyster mushrooms deliver impressive nutrition. They provide lean protein, B vitamins, and antioxidants. Their rich, savory flavor adds depth to everyday meals. You can sauté, roast, or blend them into sauces for an easy boost in taste and health.
Getting Started: Basics You Need

Choose a Growing Kit or DIY Setup
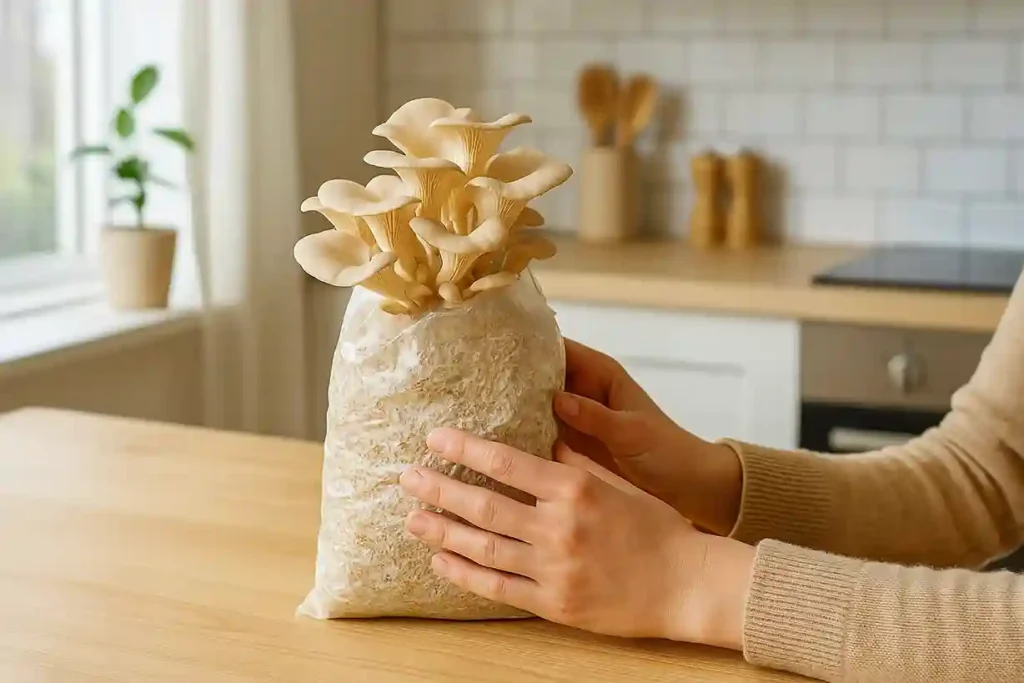
A growing kit is the fastest and simplest way to get started. Most kits arrive with a pre-inoculated substrate, which means the mushroom spawn is already mixed in. You do not need to sterilize materials or measure out exact ratios. All you do is place the kit in a proper environment, mist it daily, and wait for mushrooms to appear. This option is great for beginners who want reliable results with minimal effort. Kits often produce the first flush within two to three weeks.
A DIY setup takes more time but gives you greater control. You select your own substrate, sterilize or pasteurize it, and add the spawn yourself. While the process requires more effort, it allows you to experiment with different substrates like straw, sawdust, or coffee grounds. DIY also makes scaling easier—once you learn the method, you can expand to larger batches. Many home growers start with one kit, then switch to DIY once they gain confidence.
Select the Right Substrate Grow Oyster Mushrooms
Straw, sawdust, or coffee grounds are excellent choices for oyster mushroom cultivation. Each option is affordable, easy to source, and environmentally friendly.
Straw
Straw is one of the most common substrates. It provides good airflow, holds moisture well, and supports rapid mycelium growth. Farmers often choose straw because it produces large and consistent yields.
Sawdust
Sawdust is another strong option. It works especially well for indoor setups. Sawdust is compact, retains water, and is widely available at garden stores or lumberyards. Many growers mix sawdust with other materials to boost results.
Coffee grounds
Coffee grounds are perfect for small-scale projects. They are free, sustainable, and already pasteurized during brewing. Oyster mushrooms thrive on them, making coffee grounds a great entry point for beginners.
Choosing the right substrate matters because it shapes the speed, size, and health of your harvest.
Straw vs Sawdust vs Coffee Grounds
| Substrate | Benefits | Drawbacks | Best For |
|---|---|---|---|
| Straw | Affordable, easy to source, holds moisture well, supports fast growth | Needs pasteurization, can attract pests if not treated | Larger harvests and reliable yields |
| Sawdust | Compact, retains water, widely available, supports steady growth | Requires sterilization, slower colonization than straw | Indoor growing and long-term projects |
| Coffee Grounds | Free, eco-friendly, already pasteurized during brewing, easy for beginners | Small-scale only, risk of mold if stored too long | First-time growers and small home experiments |
Maintain Clean Tools and Environment
Cleanliness is one of the most important parts of mushroom growing. Oyster mushrooms are sensitive, and their substrate can attract mold or bacteria. Simple steps protect your project from contamination. Always wash your hands before handling spawn or substrate. Even small traces of dirt or oil can introduce harmful organisms. Wipe down surfaces where you work. A quick spray with rubbing alcohol or diluted bleach keeps tables and tools safe.
Keep your equipment sanitized as well. Buckets, jars, or bags should be cleaned before each use. If you are reusing containers, give them a thorough rinse and disinfect them. A clean environment supports healthy mycelium growth and reduces the chance of failure. With careful hygiene, your mushrooms can grow strong and deliver steady harvests.
Step-by-Step Guide to Grow Oyster Mushrooms

Prepare the Substrate
Cut Into Small Pieces
To grow oyster mushrooms successfully, the substrate must be prepared with care. Chop straw into two- to three-inch pieces so air can flow and mycelium can spread quickly. Smaller pieces also hold moisture more evenly, which helps healthy growth. Sawdust and coffee grounds require no cutting, making them simple and beginner-friendly. Choosing the right preparation method gives your mushrooms a strong start.
Soak the Substrate
To grow oyster mushrooms well, the substrate needs the right texture. Soak the material in hot water to soften fibers and create a surface the mycelium can easily colonize. Warm water also helps remove some competing organisms before pasteurization. After soaking, the material should feel damp but not soggy. This balance supports healthy mushroom growth and prevents contamination.
Pasteurize for Safety
The substrate needs to be clean before mushrooms can thrive. Heat straw in water at 160–170°F for about one hour. This temperature removes most bacteria and mold without harming the straw. Sawdust often requires full sterilization, usually done with steam or a pressure cooker, because it is dense and more likely to trap contaminants. Coffee grounds are usually safe after brewing, but they should be used fresh to prevent mold. Careful pasteurization creates the ideal foundation to grow oyster mushrooms with healthy, vigorous mycelium.
Check Moisture Level
Oyster mushrooms thrive in a substrate that’s damp but not dripping. Too much water encourages mould; too little slows colonization. Use the squeeze test: grab a handful and squeeze firmly.
- Too wet: water streams out.
- Too dry: nothing comes out, feels crumbly.
- Just right: only a few drops fall, like a wrung-out sponge.
Balanced moisture helps the mycelium spread quickly and evenly, giving you healthy growth and better yields.
Inoculate with Spawn

Mix Evenly Into Substrate
Once the substrate is prepared, it’s time to add the mushroom spawn. Break the spawn into small pieces and spread it evenly through the material. Even distribution allows the mycelium to colonize faster and reduces the risk of contamination. A balanced mix is key if you want to grow oyster mushrooms with strong, consistent results.
Seal in Grow Bags or Containers
After mixing, place the inoculated substrate into clean grow bags or containers. Press down lightly to remove large air pockets but avoid compacting it too much. Seal the bags with a filter patch or small holes to allow for gas exchange. A properly sealed container creates a safe environment for the mycelium to spread.
Incubate the Bags

Keep in a Warm, Dark Space
Place the sealed bags or containers in a warm and dark environment. The ideal temperature is between 68–75°F. Darkness is important because it encourages the mycelium to focus on colonizing the substrate instead of forming mushrooms too early. A closet, basement, or cabinet often works well for this stage.
Watch for White Mycelium Growth
Over the next 10–14 days, check the bags for signs of colonization. Healthy mycelium looks like white, thread-like fibers spreading through the substrate. This is a positive sign that your project is on track. If you notice green or black spots, contamination has occurred and the batch may need to be discarded. Careful monitoring at this stage helps ensure you successfully grow oyster mushrooms in the next step.
Trigger Fruiting

Move to Fresh Air and Indirect Light
Once the substrate is fully colonized with white mycelium, it’s time to change the conditions. Move the bags or containers into a space with fresh airflow and indirect light. Good air exchange signals the mushrooms to begin fruiting. Light should be gentle, like what you’d find near a window with a curtain. Too much direct sunlight can dry out the surface.
Mist to Maintain Humidity
High humidity is essential at this stage. Mist the growing area two to three times a day, depending on the dryness of the room. The surface should stay damp but never waterlogged. You can also use a humidity tent or plastic cover to help trap moisture. Consistent humidity ensures the mushrooms pin properly and grow into full clusters. With the right care, you’ll soon see the first flush and enjoy how rewarding it feels to grow oyster mushrooms at home.
Harvesting
Mushrooms Ready in 5–7 Days
After pinning, oyster mushrooms grow quickly. In just 5–7 days, they reach full size. The ideal time to harvest is when the caps are wide but still slightly curled at the edges. Waiting too long can make the mushrooms tougher and reduce flavor. Watching closely ensures you pick them at their peak.
Cut at the Base for Regrowth
Use a clean, sharp knife or scissors to cut the cluster at the base. This method protects the remaining mycelium and encourages new flushes. Many growers enjoy two or three harvests from the same substrate. A gentle cut at the right time keeps the cycle going and makes it even more rewarding to grow oyster mushrooms at home.
Tips to Grow Oyster Mushrooms for Bigger Yields
Use Fresh, High-Quality Spawn
The quality of spawn has a direct impact on your harvest. Old or weak spawn struggles to spread and often leads to poor yields. Fresh spawn, on the other hand, colonizes the substrate quickly, resists contamination, and produces stronger flushes. Always source from a trusted supplier who stores and ships spawn properly. Look for clean, white mycelium without discoloration or strange odors. Healthy spawn gives your mushrooms a strong start, making it much easier to grow oyster mushrooms with consistent success at home.
Keep Humidity Consistent
Mushrooms need steady moisture to grow well. Without it, growth slows, and caps may crack or shrink. Dry air is one of the most common reasons beginners see poor harvests. To prevent this, mist the substrate several times a day or set up a simple humidity tent. Some growers also use a small humidifier to keep conditions stable. Consistent humidity creates the ideal environment for pinning and cluster formation. With this balance, it becomes easier to grow oyster mushrooms that are large, tender, and full of flavor.
Harvest Clusters Before Caps Flatten
Timing makes a big difference in mushroom quality. The best moment to harvest is when the caps are fully formed but the edges remain slightly curled. At this stage, oyster mushrooms are tender, flavorful, and packed with nutrients. If you wait too long, the caps flatten, release spores, and become tougher to cook. Overripe mushrooms also slow down future flushes. By harvesting early, you keep the mycelium active and ready to produce again. This simple habit helps you grow oyster mushrooms that taste better and yield more with each cycle.
Common Mistakes to Avoid
Overwatering or Drying Substrate
Moisture balance is critical. Too much water can drown the mycelium and invite mold. Too little water leaves the substrate dry and unproductive. Always check moisture with a simple squeeze test. A few drops should escape, but the material should not drip. Careful balance makes it easier to grow oyster mushrooms that stay healthy.
Poor Airflow Causing Contamination
Air exchange matters as much as moisture. Stale air creates perfect conditions for mold and bacteria. If bags or containers are sealed too tightly, contamination spreads quickly. Provide fresh airflow, but avoid strong drafts that dry out the surface. Proper ventilation supports vigorous, clean growth.
Ignoring Temperature Needs
Oyster mushrooms prefer moderate temperatures, usually between 60–75°F. Too much heat can stall growth, while cold slows colonization. Sudden shifts stress the mycelium and reduce yields. Keeping a steady environment gives your mushrooms the best chance to thrive.
Using Old or Weak Spawn
Spawn loses strength over time. Old spawn colonizes slowly and often fails to produce healthy flushes. Always buy from reliable suppliers and use it promptly. Strong, fresh spawn is the backbone of a successful harvest.
Harvesting Too Late
Waiting too long reduces both quality and yield. Overripe mushrooms release spores, toughen in texture, and taste less appealing. Timely harvesting keeps the cycle active and encourages more flushes. Smart timing ensures you consistently grow oyster mushrooms with great results.
Health Benefits of Oyster Mushrooms
Rich in Protein and Fiber
Oyster mushrooms are an excellent source of lean, plant-based protein. A single serving offers enough protein to support muscle repair and overall energy. They also provide valuable dietary fiber, which helps regulate digestion and keeps you feeling full for longer. This balance of protein and fiber makes oyster mushrooms a smart choice for anyone focused on balanced nutrition. Unlike many other vegetables, they can play a real role in satisfying meals. That’s one reason so many people choose to grow oyster mushrooms and add them to everyday cooking.
Packed with Vitamins and Minerals
Oyster mushrooms are loaded with essential nutrients your body needs daily. They contain B vitamins, which help convert food into energy and support brain function. They also supply vitamin D, a nutrient that strengthens bones and improves calcium absorption. Potassium in oyster mushrooms supports heart health and regulates blood pressure, while iron helps carry oxygen through the blood. Together, these nutrients make oyster mushrooms a nutrient-dense food. Adding them to your diet is one more reason many people choose to grow oyster mushrooms at home for steady, fresh nutrition.
Natural Antioxidants
Oyster mushrooms supply powerful antioxidants such as ergothioneine and glutathione. These compounds help protect the body’s cells from oxidative stress, which can damage tissues over time. By reducing inflammation, antioxidants support long-term health and may lower the risk of chronic illness. They also play a role in slowing the effects of aging, keeping the body’s systems stronger for longer. Regularly including antioxidant-rich foods makes a big difference, and this is another reason many people decide to grow oyster mushrooms and enjoy them fresh at home.
Supports Heart Health
Compounds found in oyster mushrooms may help lower cholesterol levels. They work by reducing bad LDL cholesterol while supporting healthy HDL cholesterol. Their natural fiber also aids digestion, which contributes to a stronger cardiovascular system. A diet rich in fiber is linked to improved heart health and lower risk of disease. Adding oyster mushrooms to meals is a simple way to protect your heart while enjoying great flavor. This is another reason so many people choose to grow oyster mushrooms and make them part of their daily diet.
Boosts Immunity
Polysaccharides found in oyster mushrooms are linked to stronger immune responses. These natural compounds help the body activate protective cells and defend against harmful bacteria and viruses. Regular consumption may reduce the chances of common infections and support recovery when illness strikes. Oyster mushrooms also provide vitamins and minerals that strengthen the immune system further. Eating them often is a simple way to keep your body resilient. That’s why many people choose to grow oyster mushrooms at home and enjoy fresh immune-boosting meals year-round.
Adding oyster mushrooms to your diet is both nutritious and delicious. Growing them yourself ensures you enjoy the freshest health benefits right from home. Read more on health benefits
FAQ on How to Grow Oyster Mushrooms
Conclusion on How to Grow Oyster Mushrooms
Growing oyster mushrooms at home is simple, rewarding, and fun. With the right steps, anyone can turn a small space into a fresh food source. Oyster mushrooms grow quickly, require little equipment, and deliver impressive yields. Start small with a kit or a DIY setup. Each flush will give you fresh, flavorful mushrooms that taste better than store-bought. The process is exciting because you see results in just weeks. Over time, you’ll gain confidence and can expand to larger batches.
Have you tried growing mushrooms at home? Share your experience in the comments!

Michael Reyes is a versatile blogger with a primary focus on farming and sustainable living. Growing up close to nature, he developed a deep interest in agriculture and enjoys sharing practical tips on backyard farming, modern cultivation techniques, and eco-friendly practices. While farming remains his specialty, Michael also writes on a wide range of topics, from lifestyle and travel to everyday inspiration, making his work relatable to a broad audience.
Outside of writing, Michael enjoys spending time outdoors, experimenting with new farming methods, and exploring different cultures through food and travel. His approachable voice and well-researched insights make his blogs both informative and engaging.