DIY Decor Tips to Transform Your Home Magically
DIY Decor can transform any room, even with small, simple touches. A new pillow, a creative wall art piece, or unique lighting can make a space feel cozy, stylish, or magical. You don’t need professional skills or expensive materials to create these effects.
This blog shares easy-to-follow DIY decor tips and ideas anyone can try. From quick projects to slightly more detailed transformations, these strategies help you refresh your rooms and add personality. The focus is on making your home feel special, inviting, and full of charm.
With these practical tips, you can ignite magic in any room, turning ordinary spaces into areas you’ll love spending time in.
Why DIY Decor Matters

Personal touches do more than decorate—they create a sense of belonging. When you add items that reflect your personality, a room instantly feels inviting. This could be a handmade wall hanging, a favorite color palette, or a thoughtfully arranged bookshelf.
Even small DIY decor changes can have a surprisingly big effect. A new throw pillow, a unique lamp, or a small plant can transform a room from ordinary to cozy. Other touches, like a carefully placed rug or custom artwork, can make a space feel stylish or even magical.
When a room mirrors your tastes and experiences, it naturally uplifts your mood. Walking into a space you designed yourself can spark joy, calmness, or inspiration. These emotional benefits are often stronger than what store-bought decor can provide. In short, DIY decor doesn’t just improve aesthetics—it enhances the way you feel in your home.
Boost Creativity
DIY decor is a powerful way to unleash your imagination. Every choice—from colors to textures, patterns, and layouts—becomes an opportunity to express your personal style. You can mix bold shades with subtle tones or combine different materials to create a look that feels uniquely yours.
Projects like crafting wall art, designing shelves, or repurposing old furniture make decorating a playful and creative experience. Each step allows experimentation and problem-solving, turning ordinary spaces into reflections of your personality. Even small projects, like arranging cushions or creating a tabletop display, encourage inventive thinking.
The creative process itself is rewarding. It not only results in a beautiful space but also strengthens your confidence in making design decisions. Over time, exploring DIY decor can expand your skills, inspire new ideas, and make decorating an enjoyable, ongoing adventure rather than a chore.
Budget-Friendly Transformations
DIY decor is one of the most cost-effective ways to refresh a space. A simple coat of paint can completely change the mood of a room, making it feel brighter, warmer, or more sophisticated. Repurposing old furniture—like turning a vintage ladder into a bookshelf—adds functionality and charm without the high cost of new pieces.
Handmade accessories, such as custom wall art, cushions, or decorative jars, can also make a big visual impact. These items are often more unique than store-bought alternatives, giving your room personality while keeping expenses low.
With DIY projects, you achieve a high-impact look on a modest budget. Small, thoughtful changes can transform ordinary rooms into spaces that feel curated and intentional. The result is a stylish home that reflects your creativity and resourcefulness, proving that beauty doesn’t have to come with a hefty price tag.
Sense of Accomplishment
Completing a DIY decor project, no matter the size, brings a unique sense of pride and satisfaction. When you finish a task you planned and executed yourself, it creates a tangible result of your effort and creativity.
Even small projects can have a big impact. Adding string lights to a bedroom can instantly make it feel warm and cozy. Hanging a bold, handmade wall art piece can energize a living room and become a conversation starter. Rearranging shelves, creating a tabletop display, or adding custom accessories all contribute to a sense of accomplishment.
These small victories don’t just improve your space—they boost confidence and happiness. Each completed project reinforces your ability to take control of your environment and express your style. Over time, regularly engaging in DIY decor can cultivate creativity, satisfaction, and a lasting connection to your home.
Planning Your Magical Space

Before beginning any DIY decor project, spend time observing your space. Take note of the room’s size, layout, and natural light sources. A well-lit area may benefit from bright, bold colors, while a smaller or dim room might feel cozier with softer, lighter tones.
Evaluate the existing furniture and how it interacts with the space. Some pieces may be moved, repurposed, or highlighted as focal points. Look for empty corners, blank walls, or overlooked areas that could be enhanced with creative decor.
Identifying these opportunities helps you understand your room’s strengths and limitations. This ensures that your DIY decor choices—whether small accents or major changes—have maximum visual and emotional impact. A clear understanding of your space allows you to make strategic, thoughtful decisions that elevate both style and functionality.
Choose a Theme and Color Palette
Start by deciding on a theme or mood for your room. Do you want it to feel cozy and relaxing, vibrant and energetic, sleek and modern, or playful and whimsical? Defining the mood first gives your decor direction and purpose.
Once you have a theme, select a consistent color palette. Complementary colors create harmony, while bold accent colors add energy and draw attention to key areas. Even subtle shades can influence how a space feels. For example, soft blues and creams evoke calm, while bright yellows or reds inject excitement.
Small accents can reinforce your theme. Cushions, throws, wall art, and decorative items are simple ways to carry your color palette throughout the room. Even inexpensive or DIY pieces can make a big difference when thoughtfully chosen. By coordinating colors and style, you ensure that every element works together to create a cohesive and magical space.
Determine Focal Points
Identify one or two key focal points in your room. These are the areas you want to draw attention to first. A focal point could be a statement wall painted in a bold color, a unique piece of furniture, or an artistic display like a gallery wall or a large mirror.
Once identified, position your decor elements to enhance these areas. Arrange lighting, rugs, or accessories to naturally guide the eye toward your focal points. This strategy not only highlights the most striking parts of your room but also creates a sense of balance and cohesion.
Focal points make a space feel intentional and well-designed. They provide a visual anchor, ensuring that every additional decor choice complements rather than competes. By thoughtfully choosing and enhancing focal points, you instantly elevate the room, adding style, harmony, and a touch of magic.
Mini Checklist for Planning Your Space
- Measure your room dimensions and note natural lighting
- Decide on a theme or mood
- Choose a consistent color palette
- Identify 1–2 focal points
- List potential DIY decor projects for each area
- Prioritize changes that will have the most visual impact
By carefully planning your magical space, you set the foundation for DIY decor that truly transforms your room. Preparation makes the decorating process smoother and ensures that every addition enhances the overall look and feel.
Must-Try DIY Decor Tips

Tip 1: Lighting Magic
Lighting has the power to completely change a room’s mood. The right mix can make a space feel cozy, welcoming, or even magical. String lights, candles, or stylish lamps add warmth and softness, creating an inviting ambiance.
Layering different light sources enhances depth and dimension. Combine overhead lights with table lamps, floor lamps, or accent lighting to highlight key areas. Small touches, like fairy lights draped over a bed, LED strips under shelves, or a warm table lamp in a corner, can dramatically elevate the atmosphere.
Lighting doesn’t just illuminate—it sets the tone. By thoughtfully choosing and placing lights, you can transform ordinary rooms into spaces that feel vibrant, comfortable, and full of charm. Even simple DIY lighting adjustments can make a noticeable impact on both style and mood.

Tip 2: Textures and Fabrics
Incorporating varied textures instantly makes a room feel inviting and cozy. Soft materials like throw pillows, rugs, and curtains add comfort while enhancing the visual appeal of a space. These elements bring dimension and depth, preventing a room from feeling flat or one-dimensional.
Mixing materials—such as velvet, linen, wool, or woven fabrics—creates contrast and keeps the design visually interesting. For example, a velvet cushion on a linen sofa or a woven throw over a soft rug adds tactile layers that appeal to both sight and touch.
Even small textured accents, like a patterned pillow, a knitted blanket, or a textured lampshade, can dramatically influence a room’s overall mood. By thoughtfully layering textures, you create a space that feels warm, styled, and uniquely personalized.

Tip 3: Wall Wonders
Walls offer endless opportunities to express creativity and personalize your space. They can become the centerpiece of a room without taking up floor space or adding clutter. Simple DIY projects like artwork, floating shelves, or removable decals can instantly draw attention and give your room character.
Consider creating a gallery wall with framed prints, photos, or illustrations that reflect your personality. A bold DIY painting or an oversized canvas can serve as a statement piece, anchoring the room’s design. Even smaller touches, like a decorative wall hanging or patterned decals, can transform a blank wall into a visually engaging feature.
Walls are versatile—they allow experimentation with color, texture, and layout. By thoughtfully decorating your walls, you can highlight your style, reinforce your room’s theme, and make a space feel intentionally designed. With the right combination of DIY elements, walls can truly ignite magic in any room.

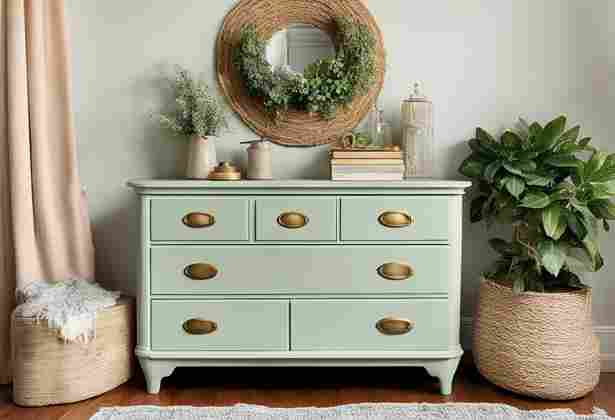
Tip 4: Furniture Flair
Small updates to furniture can completely refresh a room and change its atmosphere. Repainting old pieces gives them a fresh look, while swapping out handles or knobs adds subtle yet noticeable detail. Even simple tweaks, like repositioning a sofa or moving a chair, can improve flow and functionality.
Repurposing furniture is another effective strategy. An old dresser can become a stylish TV stand, or a ladder can be transformed into a unique bookshelf. These changes not only enhance aesthetics but also maximize the use of existing pieces.
Sometimes, even minimal adjustments make a big difference. Swapping a coffee table for a different style or moving accent chairs can redefine the space’s focal points. Thoughtful furniture updates help your room feel intentional, cohesive, and full of personality without requiring a complete overhaul.

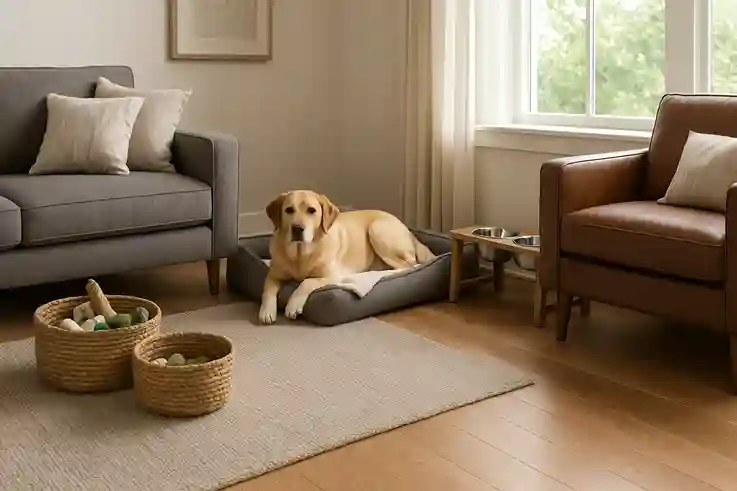
Tip 5: Green Touches
Indoor plants are one of the easiest ways to add life, color, and a calming presence to any room. Even small greenery, like a mini terrarium or a tabletop succulent, can instantly brighten a corner and make the space feel more inviting.
Hanging plants or larger potted options can soften hard edges, add vertical interest, and create a sense of depth. Mixing different types of plants—tall, trailing, or compact—introduces variety in shape and texture, enhancing visual appeal.
Beyond aesthetics, plants also improve air quality and contribute to a healthier environment. The natural element they bring creates a magical and refreshing vibe, making your DIY decor feel vibrant and alive. Incorporating greenery into your design is a simple yet powerful way to make any room feel more dynamic, cozy, and harmonious.
Quick DIY Decor Projects for Instant Impact
Sometimes, small, fast projects make the biggest difference. These DIY ideas can be completed in a single day and give your room a noticeable transformation. Personalize each project to match your style.

Statement Wall Refresh
Before
A plain or dull wall can make the entire room feel lifeless and uninspired. Without any visual interest, the space may seem smaller or less inviting. Blank walls often leave a room feeling unfinished, lacking personality, and failing to reflect your style.
After
The wall becomes a striking focal point that instantly energizes the room. A bold paint color, patterned removable wallpaper, or a carefully arranged DIY art display adds personality and depth. The space feels lively, cohesive, and welcoming, reflecting your unique style and making the room feel thoughtfully designed.
Personalize It
Add your own photos, prints, or hand-painted designs to truly make the wall your own. Choose images that evoke happy memories, favorite places, or inspiring quotes. Even small, handmade touches can transform a generic wall into a space that feels intimate and magical. Mixing textures and frames adds depth and makes the display visually engaging.

Decorative Shelving Display
Before
Shelves that are empty or cluttered can make a room feel disorganized and dull. Bare shelves lack personality, while overcrowded ones feel chaotic. Both scenarios fail to showcase your style or make the space feel welcoming.
After
The shelves become a visually appealing focal point that reflects your personality. Carefully arranged plants, books, and small decor items create balance and interest. Mixing textures, colors, and heights adds depth, while personal collectibles make the display unique. The space feels organized, stylish, and inviting.
Personalize It
Arrange items by height, color, or theme to create visual harmony. Layer books with decorative objects, and mix small plants with framed photos. Adding personal collectibles—like souvenirs, handmade items, or favorite trinkets—makes the shelf feel uniquely yours. Thoughtful placement ensures the display is both attractive and meaningful.
DIY Lighting Upgrade
Before
Standard overhead lighting can feel harsh, flat, or uninviting. It often casts unflattering shadows and makes the room appear cold or sterile. Without layered or ambient lighting, the space lacks warmth, depth, and a cozy atmosphere.
After
The room transforms into a warm, inviting space with carefully layered lighting. String lights, LED strips, or a stylish lamp add soft illumination that highlights key areas and creates a cozy atmosphere. Different light sources add depth and dimension, making the room feel magical, comfortable, and perfectly personalized.
Personalize It
Experiment with placement and layering to create the perfect ambiance. Combine overhead lights with table lamps, floor lamps, or string lights. Position lights at different heights and corners to highlight features and add depth. Adjusting brightness and angles lets you craft a cozy, magical atmosphere tailored to your space and mood.
Furniture Makeover
Before
Worn-out or dated furniture can make a room feel tired and uninspired. Scratches, faded finishes, or mismatched pieces draw attention for the wrong reasons. The overall space may seem cluttered or outdated, lacking style and cohesion.
After
Repainted, repurposed, or rearranged furniture instantly revitalizes the room. A fresh coat of paint or new hardware can modernize old pieces, while rearranging layouts improves flow and functionality. Even small changes, like swapping a chair or table, create a refreshed, stylish space that feels intentional and welcoming.
Personalize It
Small changes, like swapping handles, adding cushions, or layering throws, can make furniture feel unique and tailored to your style. Even minor upgrades reflect personality and enhance comfort, turning ordinary pieces into standout elements that contribute to a cozy, magical room atmosphere.

Green Corner Creation
Before
A dull or empty corner can make a room feel lifeless and incomplete. Bare corners lack visual interest and fail to contribute to the overall warmth or energy of the space. Without natural elements, the room may feel cold or uninspired.
After
Indoor plants, mini terrariums, or hanging greenery instantly enliven a dull corner. Lush foliage adds color, texture, and a calming presence, while strategically placed plants soften harsh lines. Greenery not only enhances visual appeal but also creates a natural, magical atmosphere that uplifts the room and promotes a sense of well-being.
Personalize It
Mix plant types, sizes, and containers to create a dynamic and visually appealing display. Combine tall plants with small succulents, hanging greenery with tabletop terrariums, or colorful pots with neutral ones. This variety adds depth, personality, and charm, making the corner feel curated, lively, and truly magical.
Each project is designed for quick implementation but offers significant visual impact. Encourage experimentation—swap colors, textures, and layouts to make each project reflect your personality.
Quick DIY Decor Projects for Instant Impact
These simple projects can transform your space in a single day. Add personal touches to make each one uniquely yours.
| Project | Before | After | Personalize It |
|---|---|---|---|
| Walls | A plain or dull wall that feels empty. | A vibrant accent wall with bold color, removable wallpaper, or DIY art arrangement. | Add personal touches with photos, prints, or hand-painted designs to make it unique. |
| Shelves | Empty or cluttered shelves. | A curated display with plants, books, and small decor items. | Arrange items by height, color, or theme. Include personal collectibles to make the shelf feel special. |
| Lighting | Standard overhead lighting that feels harsh or flat. | String lights, LED strips, or a stylish lamp create a cozy and inviting ambiance. | Experiment with placement and layering to create the perfect magical atmosphere. |
| Furniture | Worn-out or dated furniture. | Repainted, repurposed, or rearranged pieces refresh the room instantly. | Small changes like new handles, cushions, or throws personalize the look further. |
| Plants & Greenery | A dull or empty corner. | Indoor plants, mini terrariums, or hanging greenery bring life and color. | Mix plant types and containers to add variety, depth, and visual interest. |
Budget-Friendly DIY Hacks
Transform your space without breaking the bank.
Affordable Materials and Tools
Choose cost-effective supplies like paint, fabric, or basic craft tools to achieve stunning results without overspending. Even small, inexpensive items—such as washi tape, decorative paper, or budget-friendly frames—can dramatically elevate a space. Focus on creativity and layering simple elements to achieve a high-impact, polished look that feels both personal and magical.
Repurpose Household Items
Give new life to old jars, boxes, or furniture by transforming them into functional decor. Mason jars can become charming candle holders or mini planters, while old t-shirts can be stitched into vibrant pillow covers or woven into rugs. Repurposing household items not only saves money but also adds a one-of-a-kind, personal touch that makes your space feel unique and thoughtfully designed.
High-End Looks on a Budget
Focus on small, affordable upgrades that give your space a luxurious feel. Replace cabinet handles or drawer knobs with stylish alternatives, add chic throws or cushions, or layer rugs for texture and warmth. Even subtle enhancements, like decorative trays or elegant lighting, can make a room feel thoughtfully curated and magically transformed without a big budget.
FAQs
Conclusion
DIY decor empowers you to transform any room with creativity, personal touches, and budget-friendly ideas. Small changes—like layered lighting, textured fabrics, or indoor plants—can completely change the mood and feel of your space. By planning thoughtfully, experimenting with themes, and adding your unique style, you can create a magical, inviting home that reflects your personality. Start small, embrace creativity, and watch your space come alive with charm and warmth.
Want more inspiration? Explore The Spruce for easy DIY decor projects to transform your home.
Ready to bring magic to your home? Share your favorite DIY decor projects in the comments and inspire others!

Amina Pierce is a tech-savvy blogger with a specialty in electronics, where she shares practical insights on gadgets, innovations, and the latest trends shaping our digital world. With a strong interest in how technology impacts everyday life, she breaks down complex topics into clear, easy-to-understand articles for readers of all backgrounds. While electronics is her main focus, Amina also enjoys writing on a variety of other subjects, including lifestyle, travel, and personal growth, making her content both diverse and engaging.
Outside of blogging, Amina loves tinkering with new devices, exploring smart home solutions, and capturing her experiences through travel photography. Her blend of technical knowledge and approachable style makes her a trusted source of information and inspiration.